Can You Grow Peppers from Store-Bought Peppers? (My Real Results)
Can you grow peppers from store-bought peppers? See my real results, simple seed starting method, and exactly what I used to get them to sprout successfully.
GARDENINGSEED STARTING
4/5/20264 min read
If you’ve ever sliced open a pepper from the grocery store and wondered “could I grow this?” — I had the same question.
So I tried it.
And honestly… I didn’t expect much.
But about one week later, I had actual sprouts.
In this post, I’ll show you exactly what I did, what worked, and the simple setup I used so you can try it yourself.
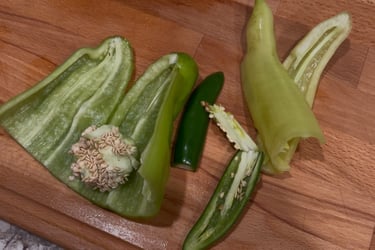
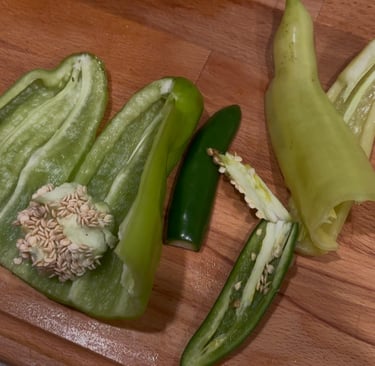
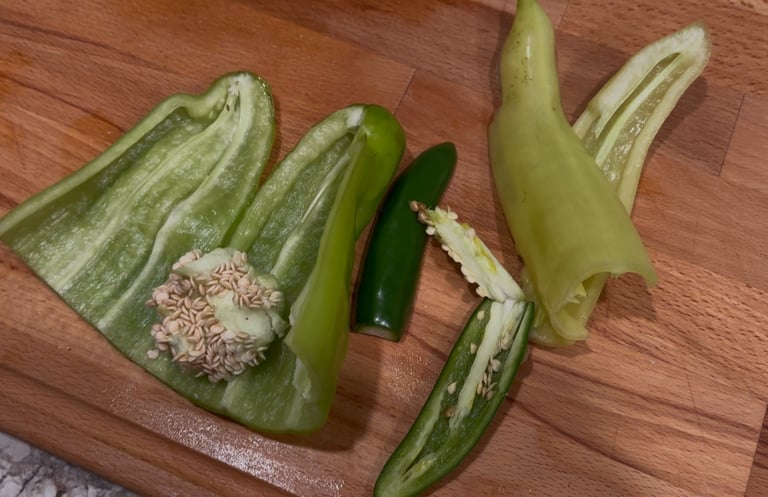
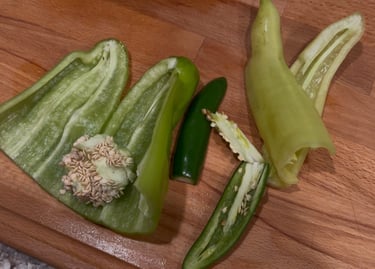
🌶️ The Peppers I Used
I used three types of peppers I picked up from the grocery store:
Hungarian Hot Banana Pepper
Sweet Italian Pepper
Serrano Pepper
I simply cut them open and removed the seeds.
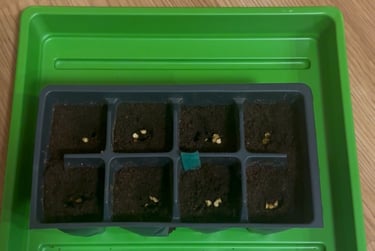
🌱 How I Planted the Seeds
This part was very simple.
I didn’t dry them out or do anything complicated.
Normally, I use soil blocking for seed starting, but for this experiment I decided to use an extra seed tray I already had. If you’re curious, I shared more about why I use soil blocking here → Why I Switched to the Soil Block Method For Seed Starting
I also kept these separate from my other seedlings and made sure to label everything (learned that one the hard way after mixing things up in the past 😅).
For the growing medium, I used Wonder Soil wafers—the same thing I use for my soil blocks. They’re super compact and expand with water, which makes them really easy to store and use without the mess of traditional soil.
I especially like them because they’re made from coco coir and include beneficial additions like mycorrhizae and worm castings. That means they’re gentle (nothing harsh for young seedlings), while still supporting strong root development right from the start—making them great for germination.
👉
Then I just:
Expanded the soil with water
Filled my tray
Placed the seeds on top
Lightly covered them
Watered gently
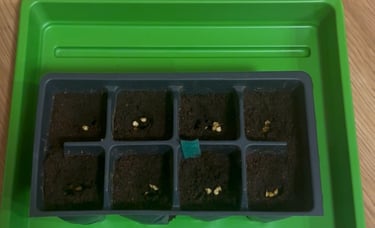
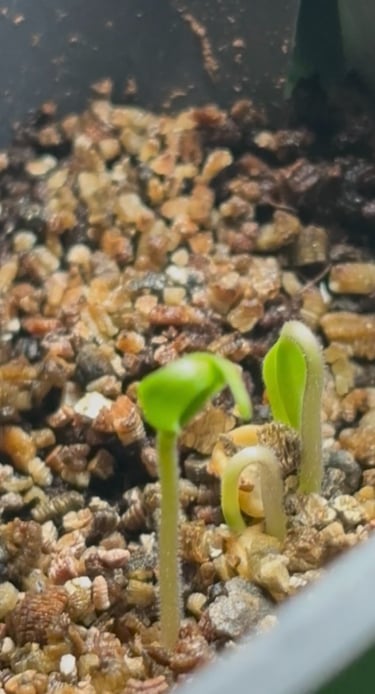
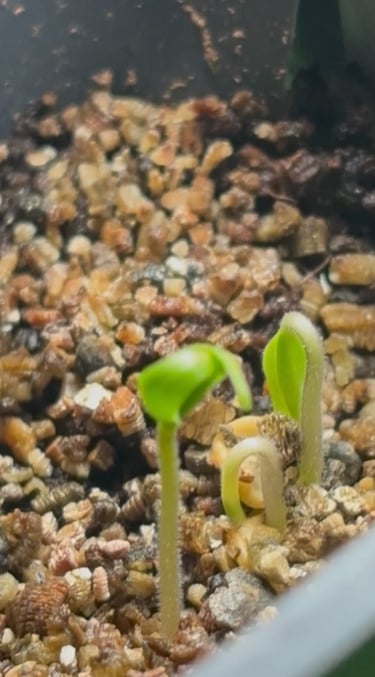
🌿 What Happened (My Results)
Within a week, I started to see sprouts!
And not just one or two — multiple seeds actually germinated.
At this point, I was really glad I kept these separate and labeled—otherwise I definitely would’ve mixed them up with my other seedlings.
This was honestly surprising, especially since these came straight from store-bought peppers.
🛠️ The Simple Setup I Used
Even though the seeds were free, having the right setup made a big difference.
This is the exact simple setup that made this actually work for me & If you want a full breakdown of my beginner seed starting setup, I shared everything I use here →Essential Seed Starting Supplies for Small Space Gardeners
A basic seed starting tray with a humidity dome →
Wonder Soil growing medium →
A small grow light →
Even with a south-facing window, seedlings often don’t get enough consistent, direct light—especially in early spring when the sun angle is lower and days are shorter. This can lead to weak, leggy growth.
A grow light keeps things consistent so seedlings stay compact and healthy.
For germination, warmth matters just as much as light. Pepper seeds germinate best in soil temperatures around 75–85°F.
If your space runs cooler, a heat mat can really improve germination speed and success →
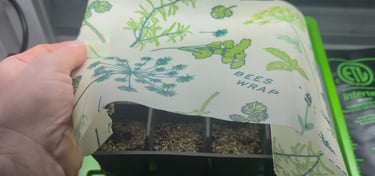
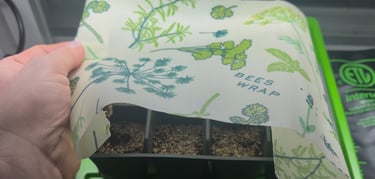
If you don’t have a humidity dome, you can also use beeswax wrap to cover the tray and hold in moisture—
I have basically switched to this method to reduce plastic use, works great! →
🌼 What I’ll Do Next
Once these grow a bit bigger, I’ll transplant them into larger containers (or eventually into a raised bed).
🌱 Why transplant?
As seedlings grow, their roots quickly outgrow small cells. Transplanting gives roots more space, improves airflow, and prevents them from becoming root-bound.
It also helps the plant put more energy into strong, healthy top growth.
🌿 When to start fertilizing
Seedlings don’t need fertilizer right away.
Once they develop their first set of true leaves, that’s when I start feeding lightly.
At this stage, plants are focused on vegetative growth—building strong stems and leaves—so a nitrogen-supporting fertilizer works best.
Start diluted and increase gradually.
🌿 My Simple Fertilizer Routine
In addition to slow-release fertilizer in the soil, I also use water-soluble fertilizers throughout the gardening season. I didn’t start using all of this at once—this is just what I’ve settled into over time as my plants got bigger and I have experimented and learned through trial and error each year.
I like using the Fox Farm trio because each one supports a different stage of growth. These are organic-based fertilizers, which fits well with a more natural gardening approach.
Grow Big (6-4-4) → Early growth (leaves + stems)
Big Bloom → General plant health (throughout)
Tiger Bloom → Flowering + fruiting stage
I like this system because it keeps things simple and removes the guesswork.
🤔 Does This Work Every Time?
Not always.
Some store-bought peppers are hybrids, which means they may not grow exactly like the original. But if your goal is to experiment and learn—it’s absolutely worth trying!
🌱 Final Thoughts
This was one of the easiest things I’ve tried in my gardening journey so far and so rewarding! The joy of gardening brings out your inner creativity and curiosity to learn and explore nature's organic beauties! This is an example of how you can experiment and learn with gardening, without spending much money!
And if you want to make it more reliable, using a simple setup like this really helps.
📌Save This for Later
Planning to try this?
👉 Save this idea on Pinterest so you can come back to it when you're ready to plant:
Grocery Store Pepper Seeds... Actually Worked!
You can also follow along for more simple gardening ideas: Pinterest
💬 Have You Tried This?
If you try this, I’d love to hear how it goes!
👉 You can connect with me here: TikTok
Or save this post and come back to it as your seedlings grow 🌱
This post may contain affiliate links, which means I may earn a small commission at no extra cost to you. I only share products I personally use or would recommend.